08 January 2012

The Sloppy Blogger's Review of 2011

If ever there was a 'Sloppy Blogger' award I'd probably won it. Looking at my blogs (after a long absence) I realised that my last entry was almost a year ago when I was looking forward to 2011. Well, I can look back at it now except there's not much record to look back at! So, here's a review of 2011-

Family Achievements:

J.J. - my 14 year old son took the selective high schools exams in June and got offered a place at the most prestigious state school in Melbourne and will be starting year 9 there in February 2012. Here is a picture of the school he worked so hard to get into :-)

29 January 2011

January is for new starts, and a lot of them :)

Yes, that's what people say, New Year New Start. I like casting on for new projects, finishing them is an entirely different matter ;)  I suppose this is due to a combination of my short attention span, my inability of knitting/crochet faster then I would like and my yearnings for new adventures, oh, and I am easily side-tracked. As January draws to a close I start to evaluate my first efforts in 2011 and I am both astonished and pleased/proud to discover that I actually cast on for nine new projects, and two of which I have actually finished! 


Here's a list of them:


So out of the 9 I cast on, 1 frogged, 2 finished and 6 still in wip. Not bad I say! One of my NYRs is to shop from my stash first for all projects, I am proud to say that I have done that with all of these projects.


Now what I didn't include in my NYRs is going on a yarn diet, that would have been unrealistic. But I do admit I have a stash problem - not that I have too much, but I'd made many impulse buys that were of bad judgement. You see, when I first returned to knitting/crochet after almost twenty years, I went a bit crazy, that and the fact that I was brought up to be swift led to a series of splurges on cheap/on sale items that were not really my taste and I seriously wonder whether they will ever be used. Having learnt my lesson I have vowed to only buy yarns that I can envisage myself using, regardless they're on sale or not. But I do need to go on a mini yarn diet, so I'm setting myself a goal of not buying any yarn for three months, i.e. from February till the end of April - that'll be a testament to my willpower. 


For February, my challenge is to only start a new project after a wip is finished. 


10 January 2011

Tunisian Resolution Scarf

I’ve been playing with Tunisian crochet stitches for a while now but never made anything with them. I found that this is a really fascinating technique, and there are infinite ways where you could put a stitch, the possibilities are endless. When I visited my parents last time I found some old pattern cuttings with black and white photos, the quality of the pictures are not brilliant and there’s no information about the stitches. But I was intrigued by this stitch...


After a dozen or so false starts, I think I finally got it sussed. When we start learning to knit or crochet, the first thing we make is most likely to be a scarf, so I’ll start by making a scarf. As one of my New Year’s resolutions is to make something in Tunisian crochet in 2011,  I’m going to call it Tunisian Resolution Scarf

Normally I like to crochet from charts, but I don’t know how to make Tunisian crochet charts. And because I’m not sure I’ll be clear with my instructions, I thought I’d use photo guides to help me. You will find the photo guides after the instructions. 
The pattern is based on a 4-stitch repeats + 1. Mine has five pattern repeats, because I don't like wide scarves. To make the scarf wider or narrower you simply add or take away 4 stitches. Also you need 1 extra stitch on each end for the edges. To calculate how many stitches you need use this formula:  #repeats x 4 + 1 + 2.  Mine has 5 repeats so I started with 23 stitches.
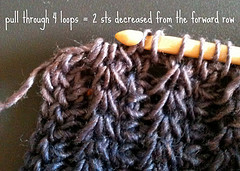
On the return row, you will be asked to pull through 4 loops together and this effectively decreases 2 stitches, to compensate you will be making an increase on either side of this action. Hopefully this will make sense once you have read through the instructions and seen the photos, so please bear with me for now :-)
What you will need

For my scarf, I used a DK weight yarn from my stash, it’s the leftover from my Not So Short Jacket. I used a 6mm Tunisian crochet hook to get a better drape. My scarf used 2 skeins about 320 meters. Of course you can use any weight yarn and hook, but I would recommend thicker yarn and large hooks for ease of manipulation and speed. :-)
If you are not familiar with Tunisian crochet there are tons of information available online. I like ChezCrochet which is a treasure trove on this technique, if you are after video tutorials you can check out CrochetKim on Youtube.
Some terminologies used in this pattern: (some are made up by myself)
  • ch :  chain
  • lp:  loop
  • st:  stitch
  • tss:  Tunisian simple stitch
  • tfs:  Tunisian full stitch (or plain stitch)
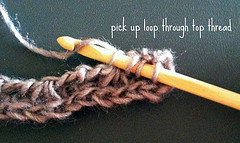
  • ttt:   this means “pick up loop through top thread”, I don’t know what this stitch is called, it’s like pick up loop through the back bump on a chain, but here it’s through the top thread between two vertical bars - please see photos below, it may make better sense.
  • yo:  yarn over
  • yop:  yarn over and pull through loop
  • p2tog:  pull through 2 loops together
  • p4tog:  pull through 4 loops together
  • FR:  forward row
  • RR:  return row (yo, *yo & p2tog* repeat between * * till end, 1 loop remain)

Instructions
Foundation row: Ch 22 23, pick up lp in 2nd ch from hook through the back bump, and in each of the back bumps across; 23 loops. (I picked up loops in alternate directions, i.e. inserting the hook from front to back, then from back to front in the next bump, so the edge doesn’t curl so much.)
Foundation RR: work as normal back to the right, 1 lp remain.
Set up FR: *tss in the next st, tfs, ttt, tfs*, repeat * * across to the left until 2 st left, tss in the next st, pick up lp through both lps on the end of left edge. 5 repeats, 23 lps.
Set up RR: yop, * yo and p2tog, yop, yo and p4tog, yop *, repeat * *across back to the right until 2 st left, yo and p2tog twice. 5 repeats, 1 lp remain.
FR: *tss in the next st, tfs through the gap, ttt on top of the p4tog, tfs through the gap*, repeat * *across to the left until 2 st left, tss in the next st, pick up lp through both lps on the end of left edge. 5 repeats, 23 lps.
RR: same as Set up RR.
Repeat the FR and RR until you have the length you want, or you run out of yarn or got bored. Oh, in case you need to join in a new skein as I needed to, I joined at the end of a return row where there were only 2 loops left, then p2tog with the new yarn, leaving a 4 inch tail. Then I did a half square knot and wove in the ends separately. I found that the backside of this stitch pattern is perfect for weaving in ends. A bonus! :-)
End row: just do a FR across to the left (23 lps) and do the return row as normal, i.e. without increase or decrease. Fasten off and weave in ends.


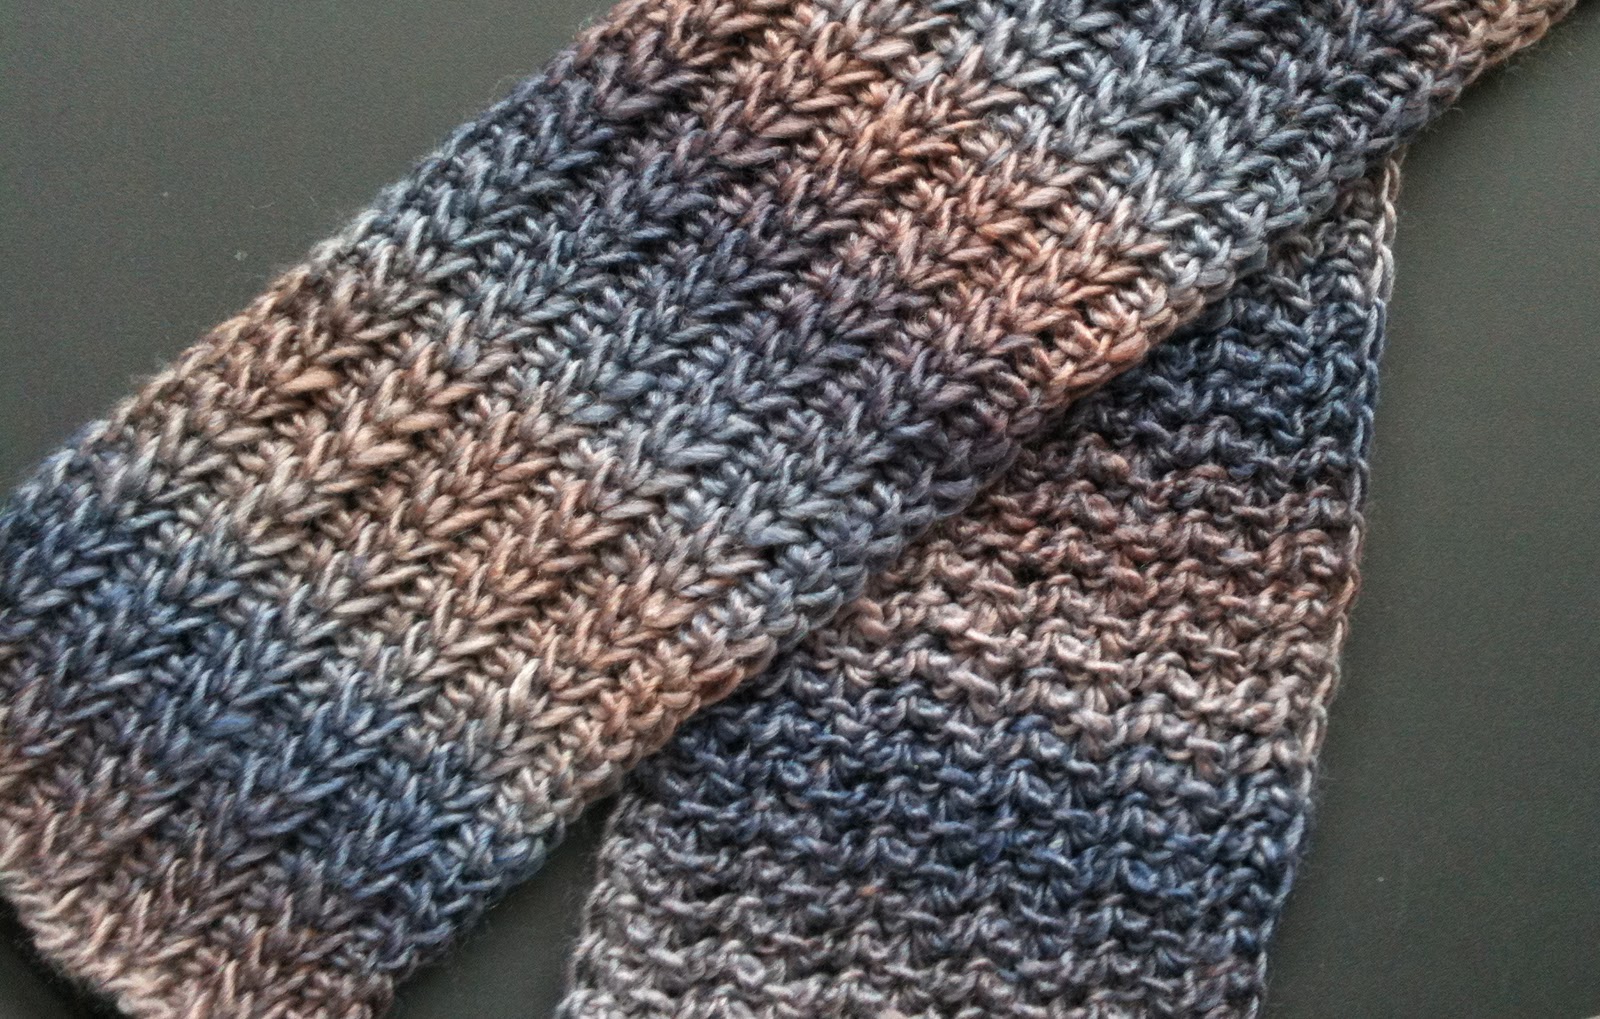
My finished scarf measures 178cm x 12.5cm or 70 in x 5 in. I found that my stitches tend to lean to the right, not quite sure how to counter this yet. I tried to loosen up a bit as I work across to the left, this helped somewhat. Also, overall you need to keep the tensions loose, or I prefer to say "keep the stitches relaxed". But do give the initial loop a little tug before you start a new row so that the right edge is not too loose.

Now I will include some photos I took along the way, hopefully they'll make sense to you. If not, I am happy to answer any questions and will do my best to clear things up for you :-)
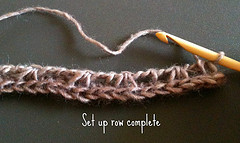
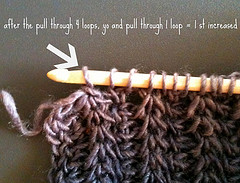
*Notice the gaps among the stitches,
that's caused by the yops (increases)


* When you do p4tog, the 1st loop is from the yop (the increased st) and the other three loops are the (tfs, ttt, tfs) from the forward row. This will result in the 3 stitches become 1. That's why you need to do yop before and after the p4tog so that you still maintain the stitch count. Gosh it sounds so confusing, hope I haven't lost you completely!  


* After the set up row, you need to do the tfs through the gaps between the stitches.

* for  ttt  after the set up row

* If you hold the left edge towards you, you should see the edge looking like slipped stitches that have two bars/loops
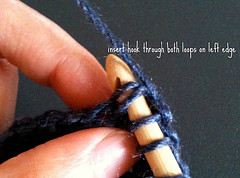


* To make a smoother edge on the left, you need to insert the hook through both loops/bars on the left edge for the last stitch on the forward row.
I hope these all make sense to you. The best way is to grab some yarn and a hook and start doing it, it is not a complicated pattern. Once you get pass the set up row, all you have to do is to repeat the same thing over and over again. If you're like me that your mind keeps wondering off in all directions other than the matter at hand, you might find missed stitches here and there, but the good thing is you can usually catch it on the return row so even if you have to frog it's never going to be too many stitches.

It is actually quite amazing how fast this worked up, and the fabric is not rigid at all. Frankly I am quite pleased with myself, and I think it turned out really nice. I hope you will enjoy it as much as I did. :-)

p.s. I'm sorry about the font sizes going up and down, I tried to fixed it but it didn't work.

29 December 2010

Race for Life Chemo Cap + 1 more

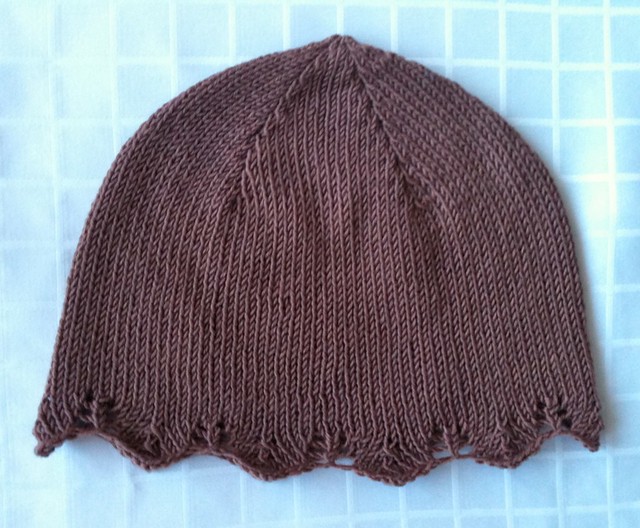
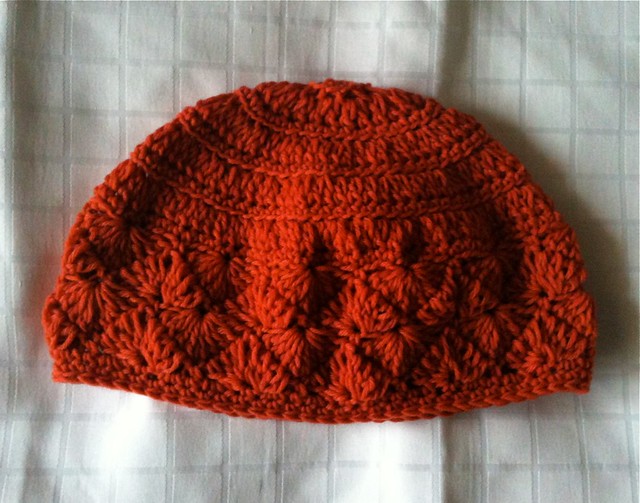
Christmas is an occasion for rejoice and celebration, and being so far away from our family and friends we especially looking forward to the Christmas cards coming from different parts of the world. Among the cards however we received some not so happy news, my DH's cousin Bridget was made redundant earlier this year, then to add to the blow she was diagnosed with breast cancer. She said in her letter that she's already been through one lot of chemo and has lost her hair, and she's due to have a second round in February. My heart went out to her and her young family, and I'm keeping my fingers crossed that she will pull through this. Being seven thousand miles away from Bridget there is little we could do to help, but I am a knitter/crocheter and I think that's how I could show my support so I made these:

Race for Life Chemo Cap

Crochet Chemo Hat


The top one is knitted in a wool/cashmere blend and the bottom one is crocheted in a merino blend, both are very soft to the touch, I'm very pleased with how they come out (the photos really don't do their justice, but I am terrible at photography). The caps are now being posted to England and I hope they would fit, but most of all, I hope Bridget will win her battle.

16 December 2010

My First Design - Mist Stole

I still can't believe that I am actually writing a pattern. My Mist Stole generated some interests on Ravelry and I have been asked for the pattern. As I have never written a pattern before, this attempt will be rather challenging.

I wanted an airy lacy stole with an easy pattern that’s quick to make, one that would give instant gratification. I have a crochet pattern book that I bought from China some time ago and it has many lovely stitch patterns, and this one always catches my eyes whenever I flip through the book, it has no name, only No.265

The stitch pattern is easier to do than it looks, it has a 15 st x 6 rows repeat, however to get symmetry one row should consist of multiples of 15 + 8 stitches. I added 3 stitches each side to make up the edges. The sample stole has 5 repeats, so 15x5 + 8 sts + 6 edge sts = 89 sts to start off (stitch count varies each row).

Yarn: any fingering weight yarn about 700 meters. (I used Patons Australia’s Mist, hence the name)
Hook: 4.5mm or size to get the fabric you like

Gauge doesn't matter in this project. My finished stole measures 20 x 68 in (51 x 172 cm), but it can easily be altered to suit your personal taste by doing more of less pattern repeats


Instructions  (American crochet terms)
Ch92, dc in 4th chain from hook (2 dc made), dc in each chain across. Total 89 dc.
Set up row: ch3 (= 1dc throughout), dc in next dc, ch1 (these 3 sts form the edge on one side) :: *4dc in next dc, skip next 6 dc, 4dc in next dc, ch4, skip next 3 dc, sc in the next dc, ch4, skip next 3 dc*, repeat  between * * 4 times ::  4dc in next dc, skip next 6 dc, 4dc in the next dc ::  ch1, dc in next dc, dc in top ch. turn.
Row 2: ch3, dc in next dc, ch1 ::  *4dc in next dc, skip next 6dc, 4dc in next dc, ch5, sc in the next sc, ch5, 4dc in next dc, skip next 6dc, 4dc in next dc*, repeat between * * 4 times :: 4dc in next dc, skip next 6 dc, 4dc in the next dc ::  ch1, dc in next dc, dc in top ch. turn.
Row 3:  ch3, dc in next dc, ch1 ::  *4dc in next dc, skip next 6dc, 4dc in next dc, ch6, sc in the next sc, ch6, 4dc in next dc, skip next 6dc, 4dc in next dc*, repeat between * * 4 times :: 4dc in next dc, skip next 6 dc, 4dc in the next dc ::  ch1, dc in next dc, dc in top ch. turn.
Row 4: ch3, dc in next dc, ch1 ::  1dc in next dc, *ch4, sc between the 2 sets of 4dc, ch4, 4dc in next dc, skip all the chains and 4dc in next dc*, repeat between   * * 4 times :: ch4, sc between the 2 sets of 4dc, ch4, 1dc in next dc :: ch1, dc in next dc, dc in top ch. turn.
Row 5: ch3, dc in next dc, ch1 :: 1dc in next dc, *ch5, sc in next sc, ch5, 4dc in next dc, skip next 6 dc, 4dc in next dc*, repeat between * * 4 times :: ch5, sc in next sc, ch5, 1dc in next dc :: ch1, dc in next dc, dc in top ch. turn.
Row 6: ch3, dc in next dc, ch1 :: 1dc in next dc, *ch6, sc in next sc, ch6, 4dc in next dc, skip next 6 dc, 4dc in next dc*, repeat between * * 4 times :: ch6, sc in next sc, ch6, 1dc in next dc :: ch1, dc in next dc, dc in top ch. turn.
These form the 6-row repeat of the pattern, repeat these 6 rows until desired length. Obviously on Row 7 you will not follow the instructions for the set up row, but by now you will have a clear picture of the pattern and your hook will know where to put the stitches. :)   Please refer to the chart if unsure.  
I finished with a Row 3, but you can finish with a Row 6 if you wish. 
End border: ch1, slip stitch in the next 3 stitches, *ch6, slip stitch in the last of 4dc, ch6, slip stitch in the next dc*, repeat between * * until only the 3 edge sts left, slip stitch till end.  turn.  ch3, dc each ch across. fasten off, weave in ends. 
Block and enjoy! :-)


Chart:
(Hint: work the chains between the groups of 4dc very tightly)
After thoughts: 
The end borders of this stole are really quite unimaginative, just plain old DCs. When I made my stole I was under time pressure and couldn’t think of a border that would compliment the stitch pattern, although I like the way it is I would love to see what other options you could come up with. 
My stole was made in one direction, but I think it would also work from centre out in both directions. I also thought about adding buttons to the sides on each end to make it convertible, the edge stitches should be perfect as button holes.