It's only been two weeks since we returned from our holiday but it all seems so distant now, sigh! The boys have gone back to school, I've started picking up bookings again and my semester will start in March, so things are getting back to "normal". It all sounds rather mundane, but it also means I'm getting back to play with fibre and yarn again, so that's ok :D
I have finally finished spinning the roving I started last July for TdF, the one started on my homemade Turkish spindle, well I cheated towards the end and finished the last bit on my wheel. It came out in a 2-ply laceweight, around 700 meters.
Although I've got (quite) a few UFOs that really need more attention, what with new year new start and all that I was too tempted to start something new. Especially since I finally got hold of The Unofficial Harry Potter Knits that Vivian kindly ordered for me - it's not available outside U.S., there are so many gorgeous patterns in this collection but I was really drawn to the Lestrange Cloak I had to cast on.
I don't particularly like knitting in black yarn so I found this fingering wool/acrylic blend in my stash in the Burgundy colourway, you can't see the pattern very well at the moment, hopefully blocking will make it look better. I'm planning to shorten the body by omitting one pattern repeat as I don't want it too long, I'm short anyway, also I'm a little worried about not having enough yarn. Fingers crossed!
Oh, by the way, Cat & Sparrow is hosting a Spin-along in our Ravelry group, all entries will get a chance to win this gorgeous drum carded batt by the end of the month. The batt weighs 100g and it's a merino/alpaca mix. Details can be found here.
Thanks for dropping by, there is more fibre arts fun at Wisdom Begins in Wonder. Indulge your creative side and join the party!
Showing posts with label lace. Show all posts
Showing posts with label lace. Show all posts
07 February 2014
30 August 2013
Minty Fresh Lace and two new projects
Happy Fibre Arts Friday! Sorry I missed posting last Friday, I was running from pillar to post and by the time I thought about it it was late and I hadn't taken any photos. Anyway, I've got a few things to show you this week.
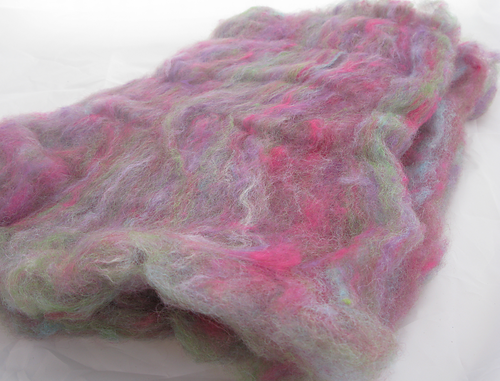
I have been playing with my mini combs, these are the fibre nests I made with baby wool and alpaca, both dyed some time ago.
These nests were so easy to spin, I was able to get a lace weight with ease. I love hand combed tops!
I started on two new projects this week, yes I know, I should really work on my WIPs but it's more exciting starting new ones!
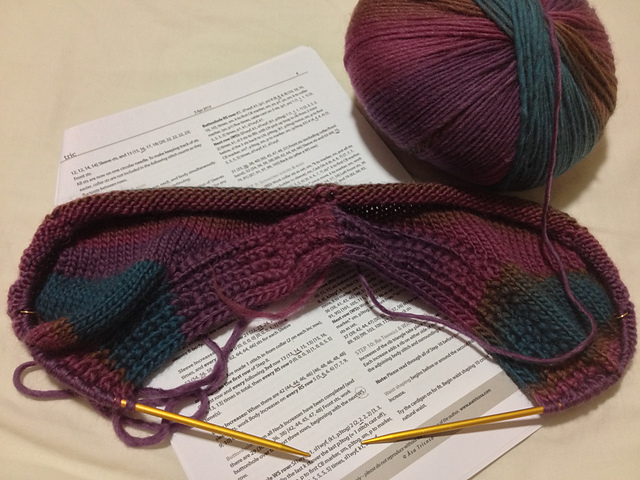
The first one is Tric by Åsa Tricos, this is the adult version of the little Trici jacket I was making for my goddaughter. I run out of yarn on the Trici and my friend is trying to get more of the same yarn, so in the meantime I cast on for the adult version for her.
The yarn is the Bendigo Woollen Mill's Murano with long colour repeats. Sorry about the picture, I missed the daylight again so I had to cope with the terrible indoor lighting. The most tricky part of the pattern is the beginning where you start with one half of the collar band then work your way back to knit in the opposite direction for the other half of the collar band, then you start working on the back, and pick up to work down on one front side and followed by the other, and simultaneously working on the sleeve caps too... phew! just talking about it makes me dizzy, I'm about half way through the sleeve caps which means the complications are almost over!
The second project I started is the Rosemary Cardigan by Cassie Castillo, I'm using Country Silk by Cleckheaton which has been in my stash for a couple of years. The needles are square which should be interesting, I've never used square one before. This project is a treat for myself, but I suspect it will take a while as other projects will no doubt take precedence, but I'm in no hurry :)
Now what have you been up to this week?
Thanks for dropping by, there is more fibre arts fun at Wisdom Begins in Wonder. Indulge your creative side and join the party!
31 August 2012
When the going gets tough ...
It has been a strange week for me, workwise it was not very productive: I have been working on this proposal for the last few weeks and just when I thought I'd got it, it all fell to pieces. And for some reason I can't seem to get it together in the way I wanted, and on top of that, I'd missed my deadline (self-imposed). So, you might say I was a little frustrated.
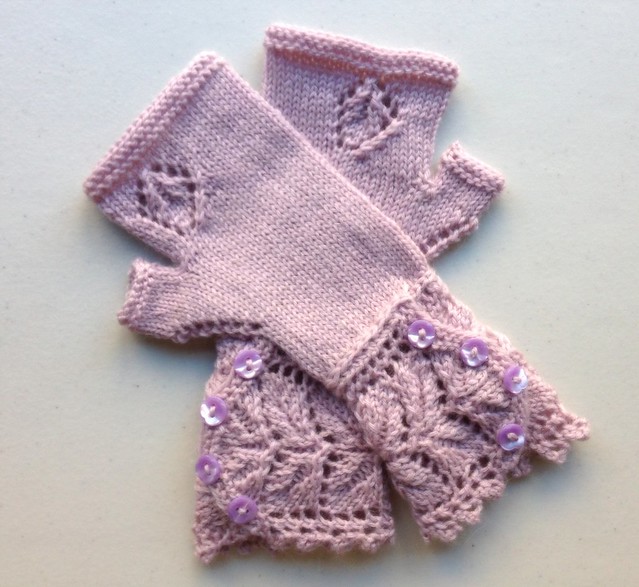
Vivian told me to get knitting when my brain's got scattered, so I did. I managed to finish the Sugar Veyla that I started last week. They came out quite well I think, and I decided to give these to my cousin for her birthday, hope she likes them.
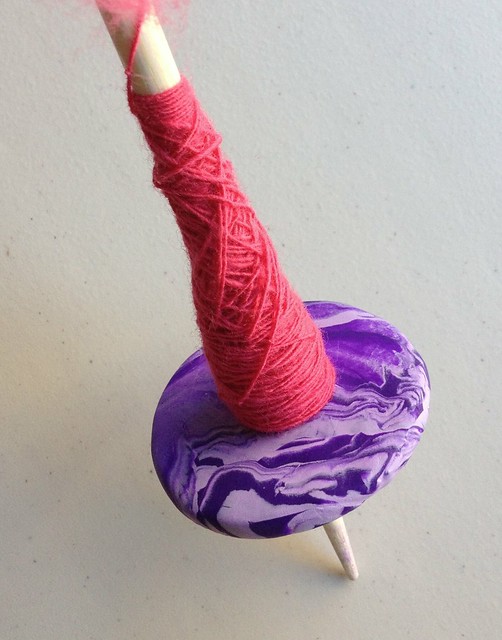
On the spinning front I made little progress, still trying to grasp the drafting technique. And, not content with having just one spindle I made one myself using this tutorial except I made mine a bottom whorl.
This was my first try at making anything with polymer clay, the centre cracked a little bit when I pushed the dowel (bamboo super chopstick cut short) through the hole even though I did let it cool. I dabbed the cracks with super glue so hopefully it will hold. It spins a lot faster than my top whorl which is quite nice. Next time I will make the hole bigger before baking.
Oh well, that's me wrapped up for this week, it hasn't gone as planned but one can't always has one's own way, such is life. I guess we'll have to make the best of whatever there is :)
Thanks for dropping by, there is more fibre arts fun at Wisdom Begins in Wonder. Indulge your creative side and join the party!
16 December 2010
My First Design - Mist Stole
I wanted an airy lacy stole with an easy pattern that’s quick to make, one that would give instant gratification. I have a crochet pattern book that I bought from China some time ago and it has many lovely stitch patterns, and this one always catches my eyes whenever I flip through the book, it has no name, only No.265
The stitch pattern is easier to do than it looks, it has a 15 st x 6 rows repeat, however to get symmetry one row should consist of multiples of 15 + 8 stitches. I added 3 stitches each side to make up the edges. The sample stole has 5 repeats, so 15x5 + 8 sts + 6 edge sts = 89 sts to start off (stitch count varies each row).
Hook: 4.5mm or size to get the fabric you like
Gauge doesn't matter in this project. My finished stole measures 20 x 68 in (51 x 172 cm), but it can easily be altered to suit your personal taste by doing more of less pattern repeats
Instructions (American crochet terms)
Ch92, dc in 4th chain from hook (2 dc made), dc in each chain across. Total 89 dc.
Set up row: ch3 (= 1dc throughout), dc in next dc, ch1 (these 3 sts form the edge on one side) :: *4dc in next dc, skip next 6 dc, 4dc in next dc, ch4, skip next 3 dc, sc in the next dc, ch4, skip next 3 dc*, repeat between * * 4 times :: 4dc in next dc, skip next 6 dc, 4dc in the next dc :: ch1, dc in next dc, dc in top ch. turn.
Row 2: ch3, dc in next dc, ch1 :: *4dc in next dc, skip next 6dc, 4dc in next dc, ch5, sc in the next sc, ch5, 4dc in next dc, skip next 6dc, 4dc in next dc*, repeat between * * 4 times :: 4dc in next dc, skip next 6 dc, 4dc in the next dc :: ch1, dc in next dc, dc in top ch. turn.
Row 3: ch3, dc in next dc, ch1 :: *4dc in next dc, skip next 6dc, 4dc in next dc, ch6, sc in the next sc, ch6, 4dc in next dc, skip next 6dc, 4dc in next dc*, repeat between * * 4 times :: 4dc in next dc, skip next 6 dc, 4dc in the next dc :: ch1, dc in next dc, dc in top ch. turn.
Row 4: ch3, dc in next dc, ch1 :: 1dc in next dc, *ch4, sc between the 2 sets of 4dc, ch4, 4dc in next dc, skip all the chains and 4dc in next dc*, repeat between * * 4 times :: ch4, sc between the 2 sets of 4dc, ch4, 1dc in next dc :: ch1, dc in next dc, dc in top ch. turn.
Row 5: ch3, dc in next dc, ch1 :: 1dc in next dc, *ch5, sc in next sc, ch5, 4dc in next dc, skip next 6 dc, 4dc in next dc*, repeat between * * 4 times :: ch5, sc in next sc, ch5, 1dc in next dc :: ch1, dc in next dc, dc in top ch. turn.
Row 6: ch3, dc in next dc, ch1 :: 1dc in next dc, *ch6, sc in next sc, ch6, 4dc in next dc, skip next 6 dc, 4dc in next dc*, repeat between * * 4 times :: ch6, sc in next sc, ch6, 1dc in next dc :: ch1, dc in next dc, dc in top ch. turn.
These form the 6-row repeat of the pattern, repeat these 6 rows until desired length. Obviously on Row 7 you will not follow the instructions for the set up row, but by now you will have a clear picture of the pattern and your hook will know where to put the stitches. :) Please refer to the chart if unsure.
I finished with a Row 3, but you can finish with a Row 6 if you wish.
End border: ch1, slip stitch in the next 3 stitches, *ch6, slip stitch in the last of 4dc, ch6, slip stitch in the next dc*, repeat between * * until only the 3 edge sts left, slip stitch till end. turn. ch3, dc each ch across. fasten off, weave in ends.
Block and enjoy! :-)
Chart:
(Hint: work the chains between the groups of 4dc very tightly)
After thoughts:
The end borders of this stole are really quite unimaginative, just plain old DCs. When I made my stole I was under time pressure and couldn’t think of a border that would compliment the stitch pattern, although I like the way it is I would love to see what other options you could come up with.
My stole was made in one direction, but I think it would also work from centre out in both directions. I also thought about adding buttons to the sides on each end to make it convertible, the edge stitches should be perfect as button holes.
Subscribe to:
Posts (Atom)


